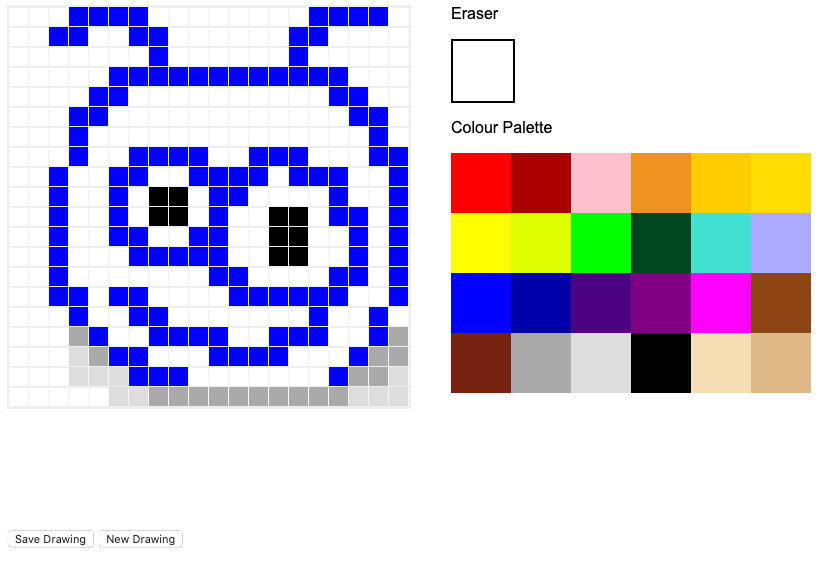
The Pixel Art Project
My friend Wendy runs a website aimed at activities that educate and entertain kids. One of the things she likes to share are free activity sheets that show pixel art with colouring instructions such as “Blue: A1 A2 C3”.
These sheets teach coordinate systems, but also produce nice pictures as an outcome. A fun twist is giving someone just the instructions, so they don’t know what the picture will look like until it unfolds.
The Challenge
As you can imagine, putting them together manually, especially in the proofing and editing stages, is a chore.
This is where I, and JavaScript, come in. I came up with a fully automated solution, so she would just need to copy and paste the result into a document and share it.
The solution would be two parts:
Paint tool, allowing the user to draw on a canvas in a familiar way.
Instructions generator, saving the user from having to interpret the drawing and translate it into instructions.
Why JavaScript?
From the specification, such as it is, we could have gone several directions. In fact, the first part of creating a drawing app could have been done away with — instead, we could have just read a bitmap and output instructions.
While that was a viable option, we felt we should restrict the palette, and restrict the dimensions to a 20x20 grid.
I also felt it was important to not require installation of software, plugins, etc that the user might not already have, and to not be platform-dependent.
While there are compilation options for Python, or could develop cross-platform C, JavaScript seemed the most immediately usable, and had the features we require.
That’s where we arrived at using JavaScript and the Canvas feature.
The Browser’s Canvas

 Credit: W3Schools
The Canvas, as the name suggests, is an object that allows you to draw pixels, lines, shapes, etc.
You can embed a Canvas into your web page using the <canvas> HTML element.
There are a couple of parameters, as you would expect:
- ID — The identifier, allows you to specify the Canvas as the target of your commands
- Width/Height — Set the dimensions in pixels
- Style — Change the appearance and visibility
<canvas id="myDrawing" width="300" height="300" style="border:1px solid black;">
</canvas>
Once you have your Canvas, you can draw to it by finding it by ID, then creating a “context” from the found object:
<html>
<head><title>Canvas 1</title><script>
 function init()
 {
 var c = document.getElementById("myDrawing");
 var ctx = c.getContext("2d");
 ctx.fillStyle = "red";
 ctx.font = "24px Verdana";
 ctx.fillText("Hello World", 80, 100);
 }
</script></head></html>
<body onload="init()">
 <canvas id="myDrawing" width="300" height="300" style="border:1px solid black;">
 </canvas>
</body>
</html>
This produces the traditional “Hello World” :)

Our first JS canvas generated drawing
Notice we make our JavaScript run onload - this is an event, and is important because otherwise, the JS might not run after the HTML is rendered, and the getElementById wouldn't find it.
Up Next
Now we have a canvas, next up we need to create gridlines and draw “pixels”!
No comments:
Post a Comment